|
When a GSAS experiment file is first created, a fair amount of information must be supplied before the refinement of parameters can be started. At a minimum, a crystallographic phase must be defined, a set of diffraction data must be loaded and a starting values for experimental parameters must be defined. Fortunately, this can be a fairly simple operation with GSAS and EXPGUI. This page shows how a crystallographic phase is specified in EXPGUI. For a mixture, this step would be repeated for each crystallographic phase. If an impurity is identified in a later stage of the refinement, this step can be run at that point to define this additional crystallographic phase. GSAS allows up to nine crystallographic phases to be included in a model. |
|
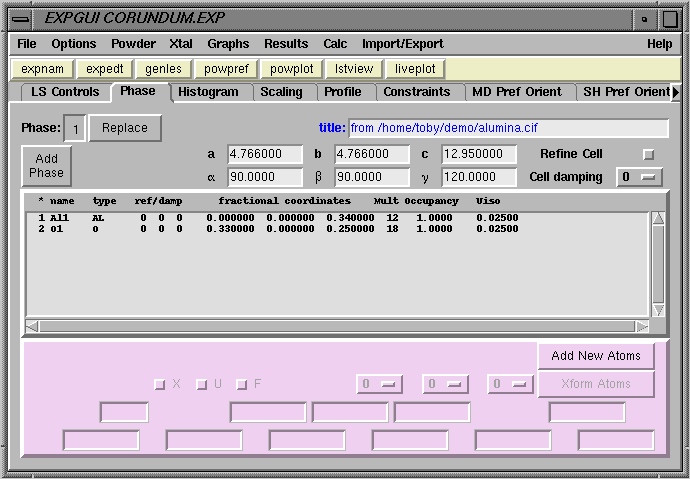
To enter information about a crystallographic phase, modify crystallographic parameters, or select crystallographic parameters to be optimized the "Phase" panel must be selected by clicking on the "Phase" tab in the upper left of the EXPGUI window. The window then appears as shown just below this text.
It should be noted that the Phase panel will have a slightly different appearance after one or more phases have been entered, (see below). |
|
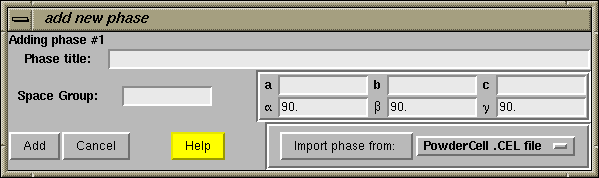
The next step is to press the "Add Phase" button in the upper left. The "Add New Phase" window, shown immediately below, is then generated.
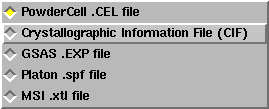
Information about the phase can be added directly into the boxes, or phase information can be read from a file. For this exercise, we will read unit cell parameters, the space group and atom parameters from a CIF file. This means that we need to select the "Crystallographic Information File (CIF)" format from the options by pressing the file format button in the lower right-hand corner.
|
|
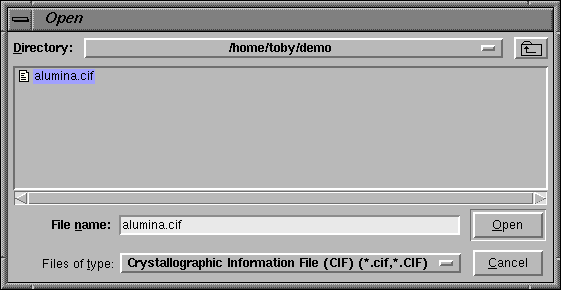
When the "Import Phase from" button is pressed, an "open file" window is created (this window has a slightly different appearance, but the same function in Windows). On this window, the file to be read is selected, and then the "Read" button is pressed.
|
|
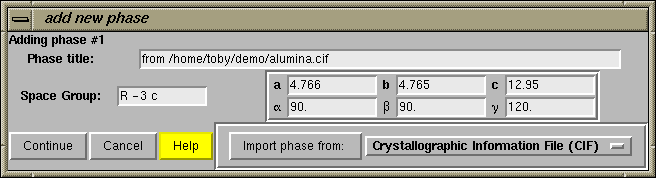
The CIF is then read and the unit cell information is included in the appropriate entry boxes, as shown below. If this input is acceptable, press "Continue".
|
|
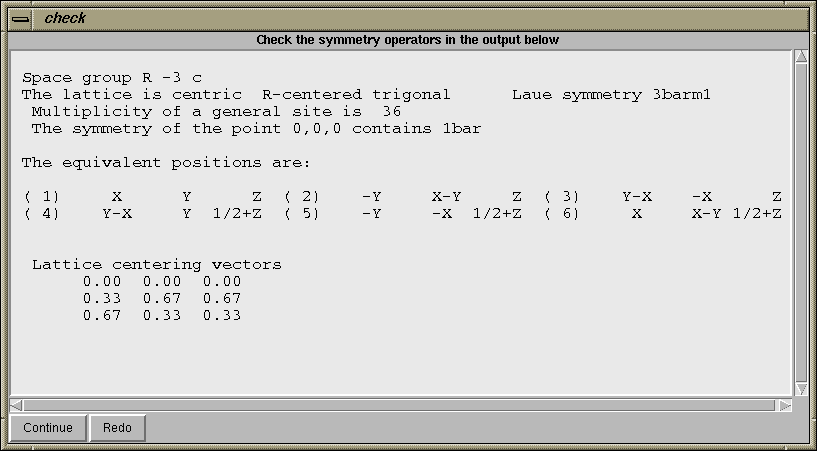
One of the places where errors occur in the preparation of GSAS input is in the entering of space group symbols. For this reason, after the "Continue" button is pressed, a window such as the one below, is created to help you confirm that the correct space group has been entered.
It is recommended that you read through this information to check that this is correct. As an example of a possible error, if one entered the corundum example in the rhombohedral setting, rather than the hexagonal setting, then the space group should be entered as "R -3 c R" (where the final R indicates the rhombohedral setting). The listing of lattice centering vectors is only appropriate for the hexagonal (centered) cell. |
|
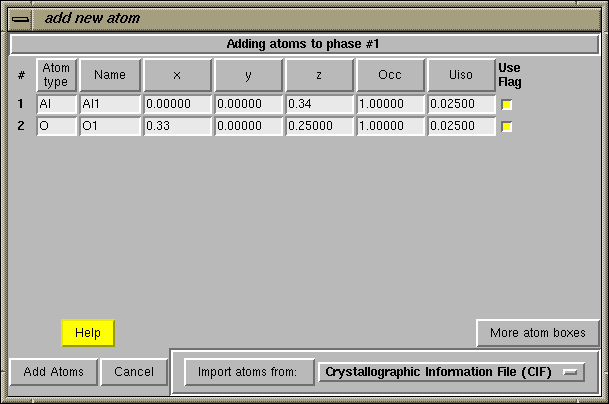
Since the symmetry information is correct in this example, press the "Continue" button on the "check symmetry" window. At this point, since atom coordinates were read from the CIF file, the "add new atoms" window is opened and the atom coordinates are entered into the appropriate boxes, as seen below. Press the "Add Atoms" button at the lower left to continue.
Note that if atoms were not being read in from a file, it would now be necessary to press the "Add New Atoms" button to input atoms to the phase. In this case, there would be no atoms entered into the window. |
|
After pressing the "Add Atoms" button, the two atoms are added to the experiment and the phase panel appears, as below.
|